The Complete Guide to the Step-by-Step Process of Full Re-Roofing
When it becomes necessary to replace a roof, a full re-roofing is the best option to ensure long-lasting protection for any home. The process may seem complex, but understanding the steps involved can simplify the job. This guide outlines each stage of the process, from inspection to cleanup.
The full re-roofing process provides a comprehensive approach to ensuring a safe and durable roof. With the right preparation, the process can be completed efficiently and effectively. Proper execution at each stage guarantees a roof that can withstand the elements for years.
Step 1: Roof Inspection Reveals Damage Extent
Before any work begins, a detailed roof inspection is essential. A professional will assess the roof to determine the extent of the damage. This step helps identify areas that need immediate attention and ensures no underlying issues are overlooked. The inspector will look for damaged shingles, leaks, and structural weaknesses. Knowing the exact condition of the roof is key to planning the re-roofing process effectively.
Step 2: Secure Permits and Order Materials
Once the inspection is complete, the next step is to secure the necessary permits. Local building codes often require permits for roof replacement, and failing to get them can lead to legal and financial complications. After permits are secured, the materials are ordered. Choosing the right materials for a roof is crucial, as they impact durability, energy efficiency, and overall aesthetics.
Step 3: Crew Protects Property and Sets Up
With permits in hand and materials ready, the crew arrives to begin the preparation. The crew will protect surrounding property, covering areas like gardens, windows, and patios with tarps. Setting up scaffolding and ladders ensures safe access to the roof. A well-organized setup helps streamline the re-roofing process and minimizes damage to the home during the project. Proper safety measures are also put in place to protect both workers and property throughout the entire roofing process.
Step 4: Remove Old Shingles and Inspect Decking
The removal of old shingles marks a crucial stage in the re-roofing process. The crew will carefully strip away the damaged shingles to expose the roof deck. Once the old roofing materials are removed, the decking will be inspected for any damage. If necessary, repairs are made to ensure a solid foundation for the new roof. This step is vital in preventing future leaks and ensuring the new shingles adhere properly.
Step 5: Install Underlayment, Flashing, Drip Edge
With the decking repaired, the next step is installing underlayment. This layer provides an extra barrier against moisture. Flashing is then installed around areas like chimneys, vents, and valleys to prevent leaks. The drip edge is added along the roof’s edges to direct water away from the structure. These materials ensure the roof is fully sealed and protected against the elements. Proper installation of these components helps prevent water damage and extends the roof’s lifespan.
Step 6: Lay Shingles, Add Ridge Caps, and Clean-Up
Shingles lie down from the roof’s bottom and proceed upward. Workers place each shingle to overlap the one below it, which directs water off the roof without leaks. Ridge caps are installed at the roof’s peak after the shingles are positioned correctly. A complete cleanup removes debris from the property and leaves everything in order. A thorough inspection ensures the roof is properly sealed and free from any potential vulnerabilities.
Re-roofing a home can seem daunting, but understanding each step makes the process more manageable. From inspection to cleanup, every phase ensures the new roof offers lasting protection. The full re-roofing process provides a reliable solution that will safeguard the home for years. For the best results, consulting a professional is essential to begin the re-roofing project.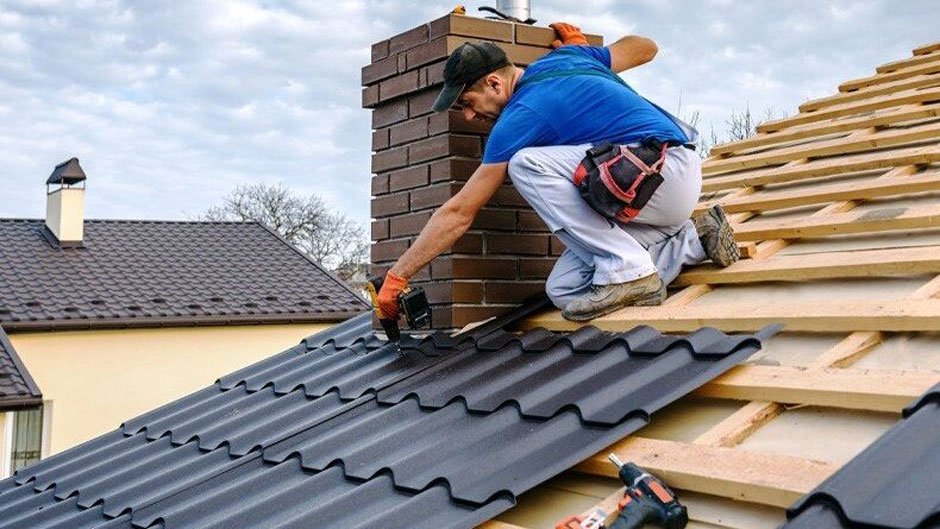
Last modified: December 18, 2025