Black shower enclosure ideas for small bathrooms and how to avoid the “dark” look
To style a black shower enclosure in a small bathroom without making it feel dark, you must prioritise visual transparency and high-reflectance surfaces. By selecting slim-profile or semi-frameless black frames, you create an architectural “outline” rather than a solid wall. Pair this with large-format light tiles (such as marble or pale stone) to minimise grout lines, and introduce layered LED lighting that includes a dedicated waterproof spotlight inside the shower. Using clear glass and low-profile slate-effect trays ensures the black hardware acts as a sophisticated anchor that adds depth to the room, rather than a heavy shadow that shrinks the space.
For years, the “rule” of small bathroom design was simple: keep everything white to make it feel bigger. But UK homeowners are breaking the rules. The black shower enclosure has become the ultimate “style anchor,” turning even the smallest ensuite into a high-end sanctuary.
However, the fear remains: Will black hardware turn my small bathroom into a dark place? The truth is that black doesn’t shrink a room, but clutter and shadows do. When designed with intent, a black shower enclosure actually provides a “graphic frame” that draws the eye and creates a sense of luxury.
Here is your guide for having a black frame enclosure or walk-in without the “closed-in feeling.
Choose the right enclosure shape to maximize floor space
In a small bathroom, the footprint of your shower is the most important decision you will make. The shape dictates the flow of the room and determines how much “walking space” you have left. Modern black shower enclosures come in various types designed for various layouts.
Black quadrant shower enclosures are the top choice for space-saving purposes. It is especially suitable. Its curved front “slices” the corner off the shower, freeing up valuable floor space in the centre of the room. It works because the curved black frame acts as a soft, architectural “reset” for the room. Because it lacks harsh 90-degree angles, the black lines feel less aggressive and more inviting.
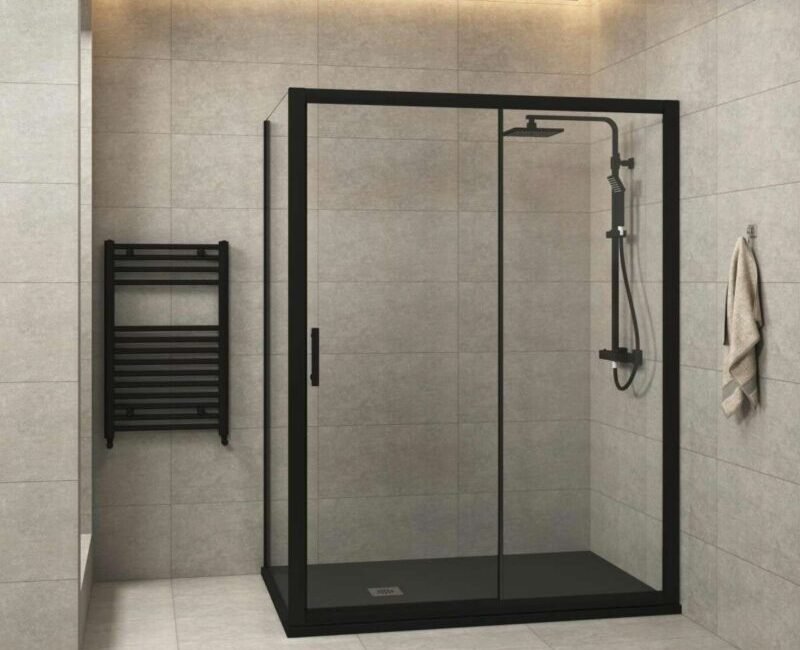
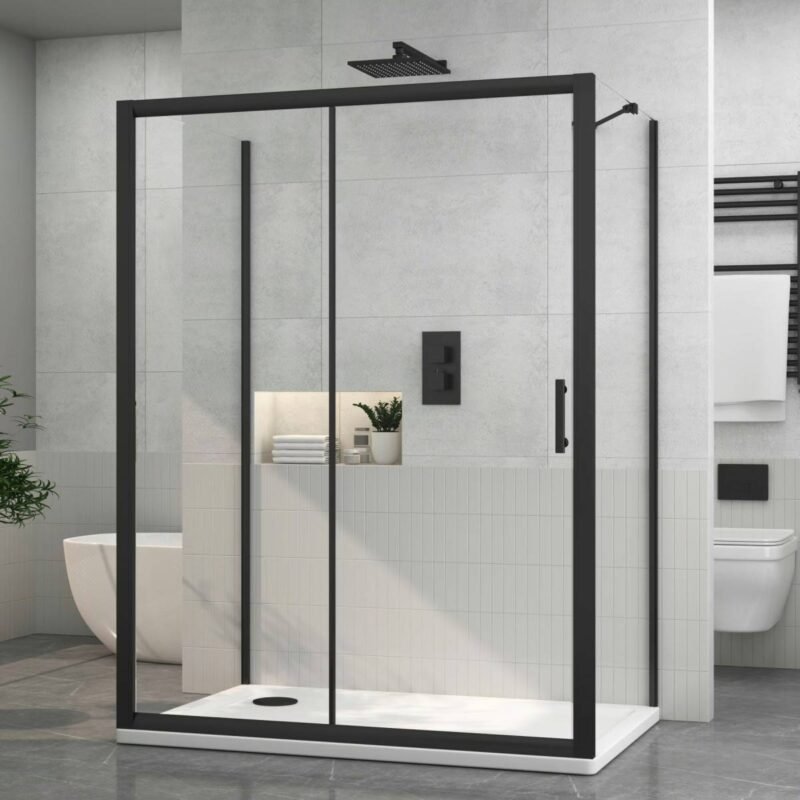
On the other hand, If your bathroom is long and narrow, a black rectangular shower enclosure is the ideal choice. It allows you to utilize the full width of the room, creating a “grand” focal point at one end.
It works perfectly because an elongated rectangular enclosure in black frames your back wall like a piece of art in a gallery. If you have a beautiful feature tile, this shape highlights it perfectly.
However, you must use a sliding door on a rectangular unit to save “swing space” in narrow rooms.
An black offset quadrant shower enclosure gives you the best of both worlds. It has one side longer than the other, providing a more generous, “luxurious” showering area while still utilizing a curved corner to save floor space. This shape provides a sense of “extra room” without overwhelming the bathroom. In a black finish, it looks like a premium boutique hotel feature.
For those who love clean, symmetrical lines, the black square shower enclosure is the go-to choice. It is simple, bold, and fits perfectly into alcoves or corners.
The sharp, 90-degree black lines create a very “industrial or “Modern Minimalist” vibe. It is the ultimate “style statement” for a contemporary cloakroom.
Use slim profiles to keep the sightlines open
In a small bathroom, the most important design principle is “visual continuity.” This means your eyes should be able to travel across the room without hitting a solid “stop.” Old-fashioned industrial showers often used thick, heavy black bars that acted like a cage. However, this trend has shifted toward slim profiles, especially for walk-in shower enclosures.
You may look for shower enclosures with an ultra-slim black profile (under 20mm). This gives you the high-contrast “pop” of black but occupies very little visual space. It frames your beautiful tiling like a piece of art rather than hiding it.
If your bathroom is particularly tight, a semi frameless black enclosure is a secret weapon. By only using black metal on the top and bottom horizontal tracks, you remove the vertical “bars” that cut the room in half. The result is a shower that feels like a floating sheet of glass with just a hint of sophisticated black detailing.
Turn your tiles into a light-reflecting canvas
Because black is a “light-absorbing” colour, the surfaces surrounding it must be “light-producing.” This is a technical design concept called Light Reflectance Value (LRV). One idea can be pairing a black shower frame with white marble-effect porcelain, which is a classic look. The white background of the tile reflects nearly 80% of the light hitting it, while the grey or gold veins “connect” visually with the black hardware.
If you want a darker tile, choose a gloss or polished finish. Even a mid-grey tile, if it has a shimmer, will bounce light around the room. Avoid “matt on matt” pairings (matt black frames against matt dark grey tiles) in small rooms, as this is exactly what creates the “cave” effect.
In addition to that, you should use the largest tiles possible (600x600mm or even 1200x600mm). Fewer grout lines mean less visual “noise.” A seamless, light-coloured wall behind a black frame makes the shower area feel like an extension of the room, not a separate box.
Master the three layers of bathroom lighting
Standard “builder-basic” lighting, usually a single central ceiling bulb, is the enemy of black hardware. It creates harsh shadows in the corners of your shower, making the room feel cramped and “muddy.” To make black work, you need layered lighting.
You must have at least one ( task lighting) IP65-rated spotlight directly inside the shower zone. This illuminates the glass and the tiles, ensuring the back of the shower is just as bright as the rest of the room.
We also recommend Cool White LEDs (4000K) for bathrooms with black hardware. Warm yellow light can make black look brown or dusty. Cool white light keeps the black looking crisp, sharp, and architectural.
The Reflective Light (LED Mirrors) also make a difference. A large, backlit LED mirror on the opposite wall to the shower is a game-changer. It acts as a secondary window, reflecting light back onto the shower glass and doubling the perceived brightness of the space.
Choose a low-profile foundation for a seamless floor
One of the biggest mistakes in small bathroom design is a “clunky” floor-line. A high-step white plastic shower tray paired with a bold black frame creates a disjointed, “chopped-up” look.
You may opt for a low-profile black or charcoal slate-effect tray. By matching the tray colour to the frame, the “foundation” of the shower disappears. It feels like a solid, grounded architectural feature rather than a plastic addition.
Use an ultra-slim tray (around 25mm to 30mm high). When the floor-line is almost flush, the brain perceives the entire bathroom floor as one continuous space. This “zero-entry” look is a hallmark of modern design and is the most effective way to make a small footprint feel massive.
Use clear glass to maximise “Visual Breathing Room”
It can be tempting to choose frosted or “smoked” glass for privacy, but in a small bathroom, this is a mistake.
Clear glass allows the eye to see the full depth of the room. It provides “visual breathing room.” If you use frosted glass, you effectively put a solid wall in the middle of your bathroom remodel, making it feel half the size.
If your budget allows, look for “Low-Iron” glass. Standard glass has a slight green tint; low-iron glass is perfectly clear, ensuring your light tiles and black frames look exactly as they should without any colour distortion.
Conclusion:
Upgrading to a black shower enclosure in a small bathroom is a bold design pivot that pays off. By focusing on the right shape whether it is a space-saving quadrant, a grand rectangular unit, or a flexible offset design or even black walk-in you can create a contemporary masterpiece that feels spacious, architectural, and intentionally styled.
Last modified: March 5, 2026